Search
Close this search box.

QuickMount® Components


Image Name Description System Type Product Type
BUG Conduit Mount QuickMount® BUG™ – Conduit Mount QuickMount® BUG™ Keep Your Conduit Snug The QuickMount® BUG™ is our latest conduit mount. Compact, sturdy and unobtrusive—leveraging the same proprietary UltraGrip™ flashing system as the HUG™ attachment. BUG™ comes… Pitched Roof Accessory
HUG Halo UltraGrip with Mill Finish QuickMount® HUG™ – Halo UltraGrip™ QuickMount® HUG® The Respect Your Roof Deserves Due to recent innovations, many asphalt shingles have bonded courses. A mount that protects without the need to pry shingles can really speed… Pitched Roof Attachment
Open-Slotted L-Mount (Mill) L-Mount® The L-Mount® is designed for cost-effective, one-bolt installation onto existing composition/asphalt shingle roofs. Pitched Roof Attachment
Lynx Metal Roof Clamp Lynx™ Metal Roof Attachment The QuickMount® Lynx™ is a robust, non-penetrating clamp for attaching solar to standing seam metal roofs. Connect with confidence. Pitched Roof Attachment
JayBox Roof Mount JayBox® Junction Box JayBox® Junction Box Protect the Nest JayBox® is an ever-adaptable junction box, designed to securely enclose wires on nearly any solar project—with ample space to shelter up to 4 module strings…. Ballasted, Flat Roof, Ground Based, Pitched Roof, Tilt Mount Accessory
QBase® Composition Mount The QBase® Composition Mount is a strong and cost-effective method for installing solar panels during the construction of new composition/asphalt shingle roof for either a new home or a roof replacement. Pitched Roof Attachment
QBase Mount QBase® Low Slope Deck Mount The QBase® Low Slope Mount is one of the strongest mechanically attached standard solar mounts available. The aluminum QBase® post has a 50 year life and is warranted to 20 years. The Low Slope Mount is available in 7″, 9″ and 12″ heights. Flat Roof Attachment
QBase Metal Shake Slate Mount QBase® Metal, Shake & Slate Mount The QBase® Metal, Shake & Slate Mount is a multi-purpose base-and-post style solar mounting system offering superior strength and waterproofing for metal shingle, shake, and slate shingle roofs. Pitched Roof Attachment
QBase Universal Tile Mount QBase Universal Tile Mount The QBase Universal Tile Mount uses the QBase foundation and two spun aluminum cone flashings for installing solar panels on tile roofs with superior strength and waterproofing. Pitched Roof Attachment
Tile Replacement Mount Tile Replacement Mount The Tile Replacement Mount provides a fast and easy way to install solar on tile roofs while protecting against water intrusion. Pitched Roof Attachment
Tile Replacement Flashing Tile Replacement Flashings The QuickMountTile Replacement Flashing replaces a tile, so there’s no messy, time-consuming tile grinding or cutting required. Works with all standard curved and flat tile roofs, and all standard rail-based racking systems. Pitched Roof Attachment
Classic Conduit Mount Classic Conduit Mount The Classic Conduit Mount lifts electrical conduit off the roof to protect wiring from overheating. These mounts use our proprietary waterproofing technology to seal the roof penetrations. Pitched Roof Attachment
Conduit Mount for Tile Conduit Mount for Tile Lifts electrical conduit off the roof to protect wiring from overheating and works with flat or curved tile and does not require tile cutting or grinding. Pitched Roof Attachment
Conduit Penetration Flashing Conduit Penetration Flashing Provides a quick, easy way to install a variety of conduit sizes through composition shingle roofs while protecting the penetration against water intrusion. Pitched Roof Attachment
Tile Conduit Penetration Flashing Tile Conduit Penetration Flashing The QuickMount® Tile Conduit Penetration Flashing provides a quick, easy way to install conduit through tile roofs while protecting against water intrusion with two seamless, all-aluminum spun cone flashings. Pitched Roof Attachment
Quick Hook for Side Mount Rails Quick Hook® for Side Mount Rails Quick Hook® is fast and simple to install. Two height options allow for use with a variety of flat and curved tiles for mounting PV on tile. Pitched Roof Attachment
Accessory Frame Bracket Accessory Frame Bracket The Accessory Frame Bracket offers fast, on the ground installation for mounting module level electronics directly to the module frame. It works with rail-based racking systems, ballasted, and ground-mounted systems. Pitched Roof Accessory

Metal Shingle, Shake & Slate Roofs

Low Slope Roofs

QRail® Racking

Other Hardware

FAQs

Can I buy directly from QuickMount?
QuickMount products are sold to installers, contractors, electricians, roofers and other trade professionals through our distribution network. If you are an installer and would like to see QuickMount products become available through your preferred distributor, let us know here.

Are QuickMount flashed mounts compatible with all rails?
QuickMount flashed mounts are designed to work with almost all standard racking systems. Our mounts will work with virtually any side mount or bottom mount rail. Side mount rails that use L-feet typically allow height adjustment via a slotted hole adjusts the rail up and down to compensate for dips and high spots on the roof. Bottom mount rails typically use shims to adjust for dips and high spots. Here are a few of the racking systems that work with Quick Mount PV products: AET, DPW Power Rail, Everest Solar, HatiCon Solar, IronRidge, Mounting Systems, Polar Racking, ProSolar, PV Racking, Renusol, Schletter, S:Flex, SnapNrack, SolarWorld Sunfix plus, SunPower, Unirac, and Unistrut.

If any of the racking systems you’re interested in are not listed here, contact us and we will help you determine if it is compatible with QuickMount products.

How long do QuickMount flashed mounts last?
SMACNA (Sheet Metal and Air-conditioning Contractors National Association) sheet metal guidelines rate aluminum components for a lifespan of 50 years and stainless steel for 100 years. SMACNA requires .032″ of thickness when aluminum or stainless flashing is used on a roof. QuickMount Classic Comp Mounts (all in one flashing and mounts) are .050″ thick and the E-Mount is .040″ thick. Flashings for our QBase mounts and the underlayment flashings for our tile mounts are .032″ thick. All included hardware is selected for durability and strength. For longevity, all exposed hardware is corrosion-resistant stainless steel; the QBase’s 5/16-inch grade 8 lags were chosen for their greater tensile and shear strength. For durability, the lags are shielded from corrosive moisture by a spun aluminum cone flashing. All QuickMount flashed mounts are projected to last at least as long as the PV system and most roofs. QuickMount flashed mounts use heavy duty EPDM rubber, the roofing industry standard for UV resistance and durability, everywhere a watertight seal is required.

Why do QuickMount flashed mounts cost more than the competition?
QuickMount flashed mounts are the best, most cost-effective code-compliant roof mounts available. Our Classic Comp mounts and E-mounts include flashing and hardware, and typically require no roof cutting and take only minutes to install. Many other mounts can take more than 10-20 minutes to install.

Considering the total cost for materials and installation time, QuickMount flashed mounts can be more cost-effective than other mounts. Many manufacturers do not include flashing and basic hardware, which you have to purchase separately at additional time and expense. All QuickMount flashed mounts for steep slope roofs include code-compliant flashings and all the hardware required to attach the mounts to the roof and the racking to the mount. QuickMount flashings and mounts are all aluminum with a 50-year lifespan, are larger and thicker than most commonly used flashings, all exposed hardware is stainless steel, and the rubber seals are high-quality heavy duty EPDM rubber.

How do QuickMount flashings compare to the competition in building code-compliance?
Building code requires flashing for every roof penetration and flashings must be installed per roofing manufacturer installation instructions. Our pre-flashed and flashing-equipped products are completely waterproof and code-compliant and will not void a roof’s warranty when applied according to the instructions given by QuickMount and the roof manufacturer. Many other products on the market for roof penetration mounts are not code-compliant and/or will void a roof’s warranty. QuickMount has done extensive research on the various building authorities and industry groups that govern the way rooftop waterproofing should be done. Many steep-slope roof mounts provide no flashing at all. Many are too small to meet roofing manufacturer requirements.

Retrofits can be challenging, as many flashing designs require cutting shingles to properly install the mount, which can void roof warranties. Less expensive all-in-one flashed mounts are often not thick enough to withstand the point load of the mount and are susceptible to “potato chipping” (compression deflection) that results in sides that bend up from the roof, reducing the effective side lap protection against capillary wicking and wind-driven rain. Our full range of flashed roof mounts are completely code-compliant precisely because they have been designed both with building codes and roof warranties in mind.

Can I get longer hanger bolts for the Classic Composition and Shake Mounts?
Yes, we also stock 8-inch, 10-inch and 12-inch hanger bolts to replace the standard 5/16″ x 6″ bolts, in cases where you’ve got to penetrate a layer of insulation before reaching the rafters. Note that the longer hanger bolts are only longer in the shank portion of the bolts. The wood thread (bottom) end remains 3 inches and the machine threaded (top) end is 1.25 inches.

Where can I get engineering reports for QuickMount products?
Engineering reports for shear and pullout strength for all QuickMount mounts are available for download here. Installers should provide these reports to design engineers and local building departments when required. Installation guides for all our mounts also feature reference tables listing the allowable loads for structural attachments. If you need more documentation, or additional technical support, please email our Tech Support team or call 1-800-227-9523.

Where do I find product specifications and installation documents?
They can be downloaded here.

Will my building department recognize QuickMount products?
QuickMount products are recognized in jurisdictions nationwide. We provide downloadable engineering reports for all our products which show vertical pullout strength and shear. QuickMount installation instructions provide step-by-step instructions on the installation process. If your building department has any additional concerns we are always happy to contact them on our customers’ behalf.

All of our pre-flashed and flashing-equipped products meet or exceed U.S. and international requirements for waterproofing. All QuickMount products exceed requirements for pullout and shear strength when used as directed.

How do I install into LVL (laminated veneer lumber)?
Treat LVL just as if it were a rafter as long as the dimensions are consistent with conventional rafters: find the center, drill the pilot hole and drive in the hanger bolt.

Can QuickMount be used on metal roofs?
QuickMount has mounts for some metal shingle roofs like Decra or Gerard, but we do not manufacture mounting systems for standing seam or corrugated metal panel roofs. For more information contact our Tech Support team.

Does QuickMount have solutions for metal shingle roofing like Decra & Gerard?
Yes! We have products and solutions that work for almost all the common metal shingle profiles and manufacturers. Since metal shingles vary considerably it is a good idea to watch our webinar, Solar Roofing Best Practices – Shake, Slate, & Metal Shingle Roofs Webinar, which covers installing on metal shingle roofs. To confirm installation procedures for a particular metal shingle please contact our Tech Support team and we’ll make sure you get everything you need to install strong, waterproof, 100% code-compliant mounts on metal shingle roofs.

Do QuickMount flashed mounts work on slate roofs?
Yes! Our QBase Shake and Slate Mount is the perfect mount for slate roofs. The mount transfers the loads from the solar array directly to the building structure so no unintended loads are placed on the slate, which would cause damage and leaks. Remember, slate is more difficult to walk and work on, so it is important to work with an experienced slate roofer for installation of the PV system mounts, racking, and modules.

What if the flat tiles are not the standard 12″ x 17″?
Our QBase Universal Tile Mount is an excellent option. . It has a large, 18″ x 18″ flashing that’s .032″ thick, so it’s strong but malleable. It employs a double-flashing system with flashing for the tile and deck (sheathing) levels. Follow the instructions in the QBase Universal Tile Mount installation manual.

I need to position a mount between two rafters. Can I install the base mount directly to sheathing?
Whenever the roof mount cannot be anchored directly into the center of the rafters or trusses, we ALWAYS strongly advise installing wood blocking (2×4 or 4×4 wood blocks) horizontally between rafters) to secure the mount to the roofing structure whenever it cannot be anchored directly to the center of a rafter (truss). OSB and plywood substrates do not provide the pullout strength required to withstand extreme wind loading conditions. The Specialty Flat Tile Mount is one of the mounts that requires blocking between rafters. If you cannot provide solid blocking, it is better to use the QBase Universal Tile Mount. Follow the instructions in the QBase Universal Tile Mount installation manual. Center the QBase over the rafter (truss) and secure it with the two 3″ lags included with each mount kit. The QBase and 6.5-inch aluminum post have been tested to 3031 lbs. average ultimate pullout (Douglas fir) and 803 lbs. average ultimate shear.

Do QuickMount products work with solar thermal systems?
Of course! Our mounts are the strongest on the market, so naturally they’re the best you can buy for mounting solar hot water on any steep slope, low slope, commercial or residential non-metal roof. Our QBase products have the highest shear strength available in any standoff style mount on the market. And our Classic Comp and Shake mounts can be supplied with a larger 3/8-inch bolt when required by local building officials, however, the 5/16-inch hanger bolt works just as well with solar thermal installations and has a similar pullout rating.

Can I use QuickMount products to support other equipment on roofs?
Our mounts also work as a waterproof, reliable solution for satellite dishes, air conditioning and electrical conduit.

How many mounts should I install per module?
The number typically calculates to 1-2 mounts per module, however the number and spacing of the mounts must be determined by a qualified designer using engineering reports and calculations that properly configure the mounting system to handle wind, snow, seismic, and array loads and with consideration of the roof structure and integrity. The number of mounts per module will vary from job to job, as no two sites are alike. Quick Mount PV provides engineering reports for pullout and shear.

How do I calculate for externally applied loads (wind, snow, seismic)?
The proper calculations will depend upon many variables and considerations. Each system designer will need to complete the calculations based on variables unique to each job. Determining the spacing between mounts depends upon the strength of the rail, the distance between parallel rails, the amount of cantilever where the modules overhang the rails, the pullout strength of the mount, the slope of the roof, wind exposure, the wind zone and roof type, the structural integrity of the roof framing, and more. We can provide structural test reports on all of our mounts, as needed. Commonly a licensed installer can answer these questions. If s/he can’t then s/he will need to find somebody who can. A licensed engineer is the best solution.

Should I re-roof before installing a PV system?
This depends on the remaining life of the existing roof. Unless the roof is within a few years old it is likely that it will need to be replaced during the life of the array. To do this it will be necessary to decommission, remove and reinstall the array. This can be an expensive endeavor. You need to find a balance between the increased cost of re-roofing now and the additional cost of removing and reinstalling the array to re-roof later. One compromise is to re-roof the area with the array now and the rest of the roof later.

Which should I choose; aluminum mounts with a mill finish or anodized aluminum?
We offer our mounts in three finishes: Mill Finish & Bronze Anodized (Black). The anodized finishes cost more, but are often favored for aesthetic reasons, because they visually blend more easily into the roof color. Another benefit of anodizing is added corrosion resistance in coastal areas with high salt content in the air, mostly within 1-2 miles of the ocean. Industrial areas can be more corrosive environments as well.

How high off the roof are the modules with the Quick Mount PV Classic Composition Mount?
Our mounting block is 1.25 inches tall. Using an L foot and a rail typically will add 2 to 4 more inches plus the depth of the module frame. This allows for the commonly recommended minimum 4″ spacing between the roof and the module frame to promote convective cooling of the PV array on most pitched roofs. Proper convective cooling design keeps temperature as low as possible for increased kWh production and longer module life. The array height can easily be increased with our height extensions, available in 2.5-inch, 3.25-inch and 4-inch lengths. Strut-style rails like ProSolar and Unistrut rails do not utilize an L foot, making their typical height 3 inches off the roof, which is why extensions might be considered, especially in hotter climates.

What length post should be used with the QBase Low Slope Mount on a low slope roof?
Post length is determined by adding the following items together: distance from the top of the roofing material to the deck below, minimum flashed height requirement (typically 4-8 inches), and desired amount of exposed post (typically under 1″).

Do UL 1703 PV system fire classification requirements apply to QuickMount roof mounts?
The UL fire test protocols do not specifically address roof mounts (attachments, feet, standoffs, hooks, etc.) unless the manufacturer requires spacing at a distance of less than 40 inches. If the PV system requires a specific make/model of roof attachment, because it was part of the fire classification test, then you need to use the hardware specified. However, if it is not specified, you may use any roof attachment and maintain the mounting system’s fire-resistance rating.

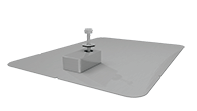
How do I raise the modules higher off the roof while using the Classic Comp Mount?
QuickMount offers height extensions in three different lengths: 2.5-inch, 3.25-inch and 4-inch. These bolt directly to the QBlock in our Classic mounts to raise the array if desired.

How do I keep from voiding a roof’s warranty?
The manufacturer’s instructions will spell out exactly what does and does not void the warranty of their roofing product. Officially, the roofing manufacturer’s instructions supersede our instructions, as our mounts are integrating with their roofing system.

On a roof with a material and labor warranty in place, it is strongly recommended to consult the roofer of record. Often the roofing contractor will void the labor portion of their warranty if someone from another trade modifies their work. Give the roofing contractor the option of handling the roofing modifications, or at least give them the opportunity to inspect and approve the modifications you make. There may be fees to this roofer, but if it maintains the labor warranty, it should be money well spent.

Do a thorough roof evaluation before beginning work. Take photos of important roof features and determine the quality of the roofing so any repairs or replacement can happen before or in conjunction with the installation. On a composition/asphalt shingle roof it is important to know as much as possible about who manufactured the materials, the age of the roof, the type of substrate (plywood or oriented strand board ), the rafter size, spacing and span, the age of roof structure, who built the home and who roofed it.

Often the building owner will have the name of the composition manufacturer on file. If not, take a piece of the roof material to a roofing yard; they can usually recognize the maker and its approximate age. Tile roof manufacturers put a stamp of some sort on the back of each tile. This mark can be identified by the roofing yard, or by doing research via the Internet. Once you know the manufacturer, it should be easy to obtain their written installation instructions.

The manufacturer’s instructions will spell out exactly what does and does not void the warranty of their roofing product. Most have a clause about a recommended range of rooftop temperatures appropriate for installing the roof. This is commonly missed, but can easily be noted if you read the instructions. It is also important to have manufacturer instructions in the job file, for future reference. If no manufacturer can be found, there is likely no warranty in place.

What is the best method for locating rafters?
This is a common question. Unfortunately, because there are many types of roofs and considerable variation in construction, there is no one right answer. Rafters should be spaced 16 or 24 inches on center but, once you get on the roof you’ll find that structures shift and settle, designs and installations change, and remodels or additions happen, so it’s best to assume that no two roofs will be the same.

There are a few tricks for finding the exact location of the center of the rafter. First, you will want to find out as much as possible about the roof before you begin your installation.

One of the easiest and most common methods is to look at the overhang of the roof. When the ends of the rafters are visible, it’s possible to project the course of the rafters up the roof from there. Use a chalk line to mark the rafter location.

Another is to locate an eyebrow vent on the roof and measure off its center equally in both directions. It is also possible to find rafters using a “deep wall scan tool”. During frosty conditions the rafter’s perimeters will be visible from the roof.

Climbing into the attic space reveals the structural layout from the inside, so you can see exactly where the rafters are. Map the rafter locations by measuring the base, center, and top of each rafter and transfer this map to the surface of the roof. One way to transfer locations from below to on top of the roof is to drill a hole adjacent to a rafter and then measure over ½ the width of the rafter.

Will any sealant do?
No. It is important to use a sealant compatible with all the materials it will contact. Most roofing manufacturers have a suggested or approved roofing sealant that is compatible with their roofing type. Using a sealant that is not approved by the roofing manufacturer can void the manufacturer’s warranty. Geocel 4500, Chemlink M1, Solar Seal 900 are three examples of several good sealants with adhesive properties that are compatible with composition shingles, metals, wood and EPDM Rubber. In the freeze-thaw zones, it is important to follow the manufacturer’s guidelines for freeze-thaw conditions.

In the past installers have counted on Sikaflex as a universal sealant. The specifications of Sikaflex 1A, however, state: “Do not use in contact with bituminous/asphaltic materials.”

It is very important to use the roofing manufacturer’s suggested/recommended/approved sealants. Using the wrong sealant may cause a chemical reaction to break down your sealant or the roofing material faster than its stated lifespan, risking water intrusion. The more you know about the roof you are working with the more you can respect its properties to insure high quality, watertight mounting systems.

Is it possible to apply too much sealant?
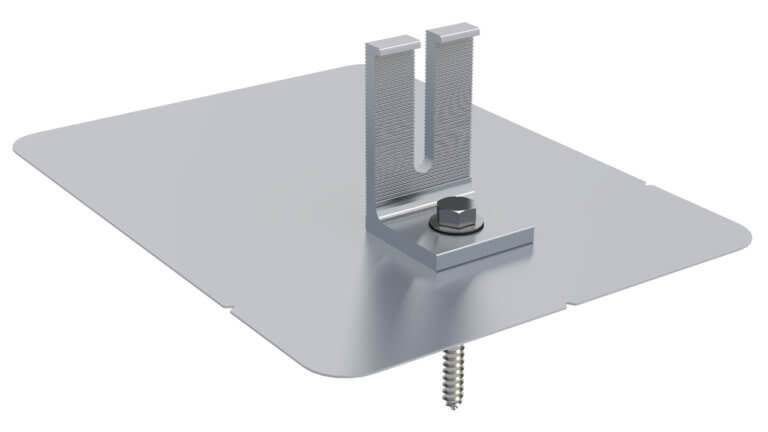
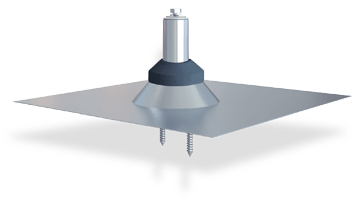
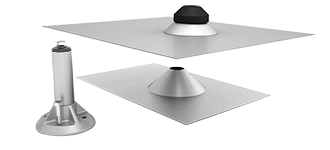
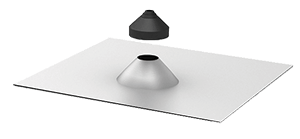
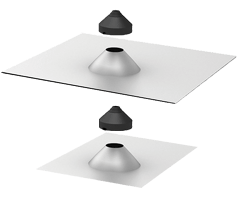
Yes. It is required to put sealant in the pilot hole prior to driving the hanger bolt and our QBase Mounts also use sealant where the flashing meets the post. Some people put a bead of sealant on the bottom of the flashing in a horseshoe shape about four inches across with the open end on the low side of the roof. This should be the extent of any extra sealant, as we still want the flashing to float with the expansion and contraction of the roofing materials, as it was intended.

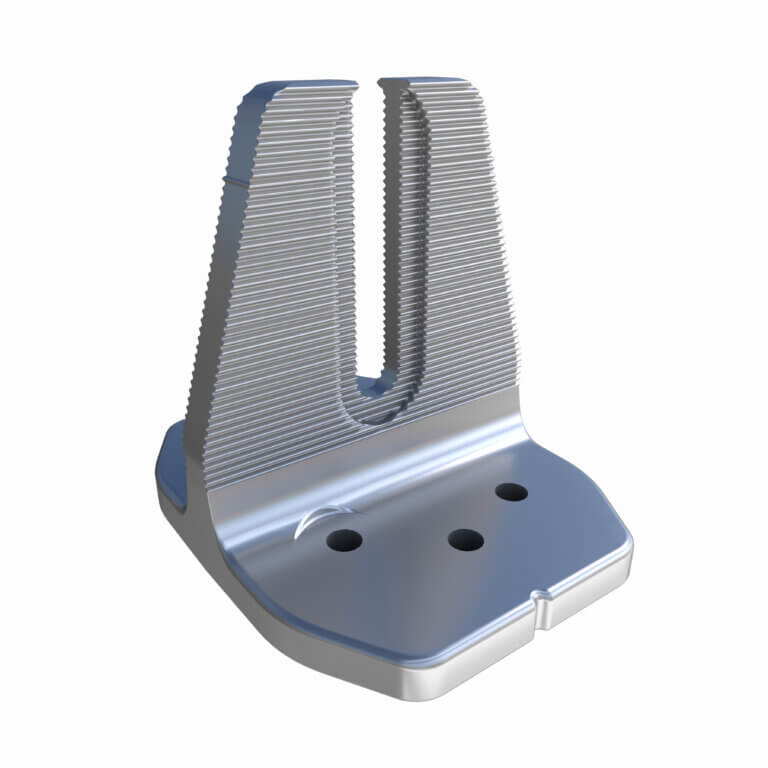
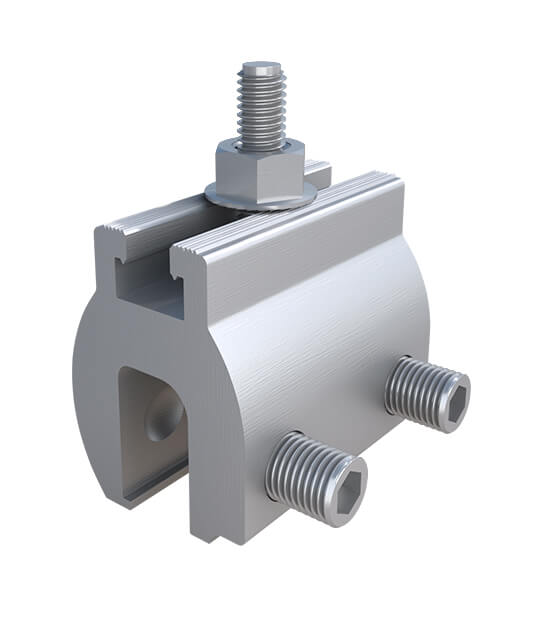
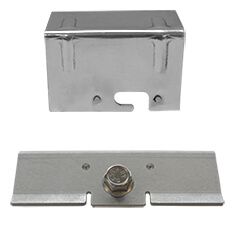
What are the torque specifications for the Classic Comp Mount?
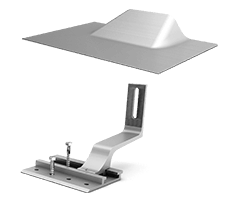
The best way to establish proper torque is to grasp the QBlock while tightening the mounting bolt and lightly rotate the block back and forth while tightening the mounting bolt. Stop tightening as soon as the QBlock stops rotating. Ideally, the QBlock should be oriented at a 45 degree angle to promote water drainage.

Can I mount directly to an I-joist?
No. While some manufacturers and engineers may allow this, we strongly recommend installation of solid blocking between the I-joists and then mounting to the blocking. Bolting directly to the top of an I-joist may cause damage to the I-joist and risks inconsistent and potentially inadequate pullout strength. Be sure to follow the I-joist manufacturer’s instructions.

How do I remove Quick Mounts from a composition/asphalt shingle roof?
There are two methods of removal:

1. If you are temporarily removing the PV system to re-roof and reinstall in the same location, just remove the nuts and washers at the top of the mount to allow removal of the flashing. Leave the hanger bolts in place and reassemble the new roofing around them before reinstalling the PV arrays.

2. If you need to remove the hanger bolts, lock two nuts together at the top of the hanger bolt, then use a half-inch open-end wrench on the bottom nut to back the hanger bolt out. Unlock the two nuts and reuse them. It’s also possible to use a heavy nut on the bottom (5/16″ nut x 9/16″ hex), locked to a normal nut on top (5/16″ nut x ½” hex). Then, a deep 9/16″ socket will span over the 1/2″ hex, and you can spin them out quickly with a cordless gun.

Watch our Quick Tips ~ Bolt Removal for The Classic Comp Mount video for more info.

Are QuickMount trainings available?
Yes, QuickMount resources are now provided through IronRidge. Training sessions are available as webinars or hands-on presentations offered at distributor dealer trainings, trade shows, as a part of PV and thermal installation classes, and in conjunction with other training organizations. We also have on-demand training on our website. For a list of upcoming trainings and events you can visit our events page.

Do flashings need to be grounded?
Flashings (or any other exposed metal surfaces) do not need to be grounded as long as the PV system meets the following criteria:

1. The PV system must be a “non-separately derived system” i.e. grid tie or grid tie battery backup system – Off grid (stand alone system) flashings and other exposed metal surfaces may require bonding to ground.

2. The PV system must have a “defined” ground path – If you use a ground wire connected directly to module frames with outdoor rated grounding lugs, there is no problem defining the ground path, but if you use grounding washers with piercing teeth or other piercing type bonding hardware that bond the module frames to ground through the racking system, you must define the bonding and grounding path in the plans and have clearly-visible, permanent labeling of the bonding and grounding path.

3. The PV cables must be routed in a way that prevents contact with “accessories” (flashings, array skirts, wind deflectors, wire management clips, and mid/end clamps) in the event of failure. This may necessitate wire to be clipped securely to the modules frames as regular intervals or contained in conduit, wire raceways, or inside the racking system rail (like inside a strut style rail). It is recommended that the wires not be able to be pulled out of the raceway if they are accidentally cut.

Do third-party engineering reports expire?
All our third-party engineering reports are stamped by a licensed professional engineer at the time the reports were prepared and do not expire. Our engineering reports continue to be valid as long as the professional engineer’s license (date within the stamp) was valid when the reports were prepared (the report date). Even if the license has expired between the time the engineering reports were prepared and the time when a local agency reviews them, the reports do NOT need to be re-stamped with a current stamp.

Download full explanation here.

Codes and guides referenced in this letter: Professional Engineer’s Act
and Guide to Engineering and Land Surveying for City and County Officials provided by the California Board for Professional Engineers and Land Surveyors (BPELS).